
How to Choose the Right Lighting Fixtures for Any Room

Choosing Lighting Fixtures is not simply a matter of matching a lamp to a sofa. Light shapes how a room feels and how well people can use it. A glass pendant may look striking above a dining table, yet cast glare across the plates. A shaded lamp can soften a reading corner, but may leave the page dim. The best choices balance appearance, task, and comfort.

Architect Louis Kahn captured the importance of light: “A room is not a room without natural light.” His observation is a useful starting point, even when daylight is limited. Begin by noting where sunlight falls and where shadows gather. In kitchens, combine clear task lighting over counters with softer ambient light. Living rooms often benefit from layered sources, such as a ceiling fixture and adjustable floor lamps. Bedrooms usually call for gentler light near the bed and brighter illumination for dressing. Small changes matter.

Check the fixture’s scale, light output, color temperature, and compatibility with dimmers before buying. A large pendant can overwhelm a narrow entry; a tiny ceiling light may feel weak in a broad room. Read product specifications, and consider how easy each fixture will be to clean or maintain. Even a careful plan can miss something: paint colors and finishes may look different under warm or cool bulbs. If possible, test a bulb at home before settling on a full set. This guide explains how to choose Lighting Fixtures room by room, with practical details—and a reminder that the first choice is not always the right one.
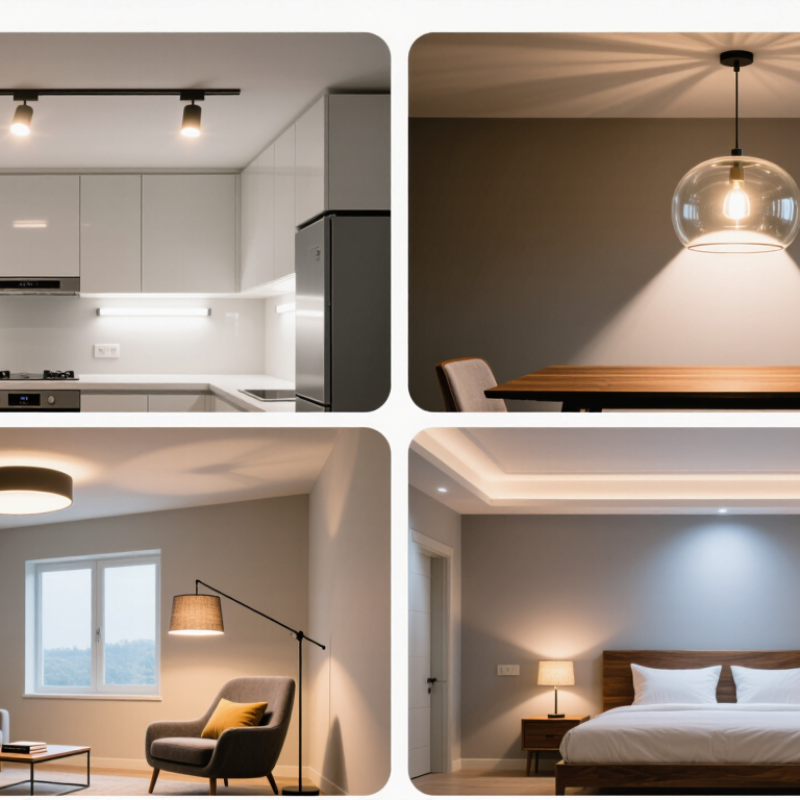
How to Choose the Right Lighting Fixtures for Any Room

Assess Room Activities and Set Illuminance Targets Using IES Guidance

Choose lighting by the activity, not by room name alone. The Illuminating Engineering Society’s Lighting Handbook, 11th edition (2020), ties illuminance guidance to the task and viewing conditions. Measure light on the work surface: a ceiling fixture may brighten the room while leaving a chopping board dim. As practical starting points, aim for roughly 300 lux for casual reading and around 500 lux for detailed kitchen preparation. These are targets to test, not universal rules.

Start with the task. Then check glare, shadows, and contrast. At a desk, place a lamp so your writing hand does not cast a hard shadow; in a hallway, prioritize even light over a bright central spot. The International Commission on Illumination’s CIE 227:2017 report discusses lighting needs among older people, including the value of adequate illuminance and visual comfort. Age, eyesight, wall color, and daylight can all change what feels clear. I still find that a neat plan often needs adjustment once furniture is in place.

Use a lux meter at seated eye level or directly on the task surface, depending on what you are assessing. Take readings at night and during daylight. If the reading is low, add focused task lighting before increasing every fixture’s output. Recheck after moving a lamp. Light behaves differently in a real room.

Calculate Fixture Output in Lumens for Each Task and Surface

Choose light by the job it needs to do, not by room size alone. Lumens measure light output; lux describes light reaching a surface. A useful estimate is target lux multiplied by the surface area in square metres. For a 2-square-metre desk used for detailed work, 400 lux calls for about 800 lumens reaching the desk.

The fixture needs to produce more than that because some light misses the surface or is absorbed by walls and shades. Divide the estimate by an efficiency factor, often roughly 0.5 to 0.8 for a simple planning calculation. At 0.6, that desk would need about 1,330 fixture lumens aimed toward the task. Treat this as a starting point, not a guarantee. Fixture design and room finishes change the result.

Match the target to the task. General room lighting may work around 100–200 lux, while reading or kitchen-counter work often benefits from roughly 300–500 lux. Dark counters can need more than pale ones. Check whether a package lists bare-lamp lumens or the complete fixture’s output, and add the output of multiple fixtures when appropriate. Then test the actual surface: a book shadow or a dim chopping board tells you something a calculation cannot. I’d adjust gradually; the estimate is useful, but never quite the whole story.

Choose Fixture Types and Placement for Ambient, Task, and Accent Light

Ambient light sets the room’s overall brightness. Use a ceiling fixture, pendant, or several recessed lights, then place them to avoid dark corners and harsh shadows. A single bright ceiling lamp can make a room feel flat. In a living room, add a floor lamp near a reading chair and soften the general light with dimming. The U.S. Department of Energy reports that LEDs use at least 75% less energy and last up to 25 times longer than incandescent lighting, making them a practical option for frequently used fixtures.

Task lighting should land where work happens, not merely where a fixture is easiest to install. Position a desk lamp to light the page without reflecting off a screen; under-cabinet lights can brighten kitchen counters while keeping your body from casting a shadow. The Illuminating Engineering Society’s Lighting Handbook gives task-specific illuminance guidance; reading and writing often call for roughly 300 lux at the work surface, though age, contrast, and personal comfort matter. Check the light where the task happens.

Accent lighting adds depth. Aim a wall light or adjustable spotlight at artwork, a textured wall, or a shelf, and keep the beam out of people’s eyes. A small pool of light can be enough. Test placement after dark: glare may appear only when you sit down, and the “perfect” fixture can still feel wrong. Adjust it.

Compare LED Options: DOE Reports at Least 75% Less Energy Use

Choosing lighting starts with the room’s actual job, not the fixture’s appearance. The U.S. Department of Energy reports that residential LEDs use at least 75% less energy than incandescent lighting. They can also last up to 25 times longer. Compare bulbs with similar lumen output; watts measure energy use, not brightness. A 9-watt LED can often replace a 60-watt incandescent bulb, though actual brightness varies by product. Check the package.

In a kitchen, aim light at counters, where chopping creates sharp shadows. In a bedroom, a shaded bedside lamp can soften the light without illuminating the whole room. Color temperature matters, too: warm white often feels restful, while cooler light can help reveal detail in work areas. Small details matter. Confirm that a bulb suits enclosed fixtures and works with the installed dimmer; otherwise, it may flicker or fail early. The energy savings are compelling, but I have learned that a technically efficient bulb can still feel harsh in the wrong shade or position. Test one fixture before replacing every bulb.

Check Color Quality, Dimming, and Safety Ratings Before Installation

Before installing a fixture, inspect color quality, not just brightness. The ENERGY STAR Lamps Specification sets a minimum Color Rendering Index (CRI) of 80 for qualified lamps. A higher CRI can help skin, food, and paint look more natural, though numbers alone cannot predict how a warm wall will appear at night. Check the light beside your actual finishes. Small samples can mislead.

Dimming deserves its own test. The U.S. Department of Energy notes that not all LED bulbs are dimmable, and compatible controls matter. Look for clear dimmer compatibility on both product labels, then test the lowest setting for flicker or sudden shutoff. The DOE reports that LEDs use up to 90% less energy and last up to 25 times longer than incandescent lighting; poor dimming can still make an efficient lamp frustrating to use.

Check the fixture’s safety certification and its dry, damp, or wet-location rating before installation. A bathroom ceiling near a shower needs an appropriate moisture rating; a covered porch is not automatically a dry location. Match the lamp’s wattage to the fixture label, and do not guess about wiring or a loose ceiling box. Ask a qualified electrician when those details are unclear. I would not treat a familiar-looking socket as proof that the whole fixture is safe.

How to Choose the Right Lighting Fixtures for Any Room — Check Color Quality, Dimming, and Safety Ratings Before Installation

Room or Area Suitable Fixture Type Light Output Guide Suggested Color Temperature Color Quality Dimming Check Safety Rating to Verify
Kitchen work areas Recessed or surface-mounted general lighting, supplemented by under-cabinet task lights Plan roughly 30–50 lumens per square foot for general ambient lighting; add focused task lighting where needed. 3000–4000 K CRI 90 or higher helps food and countertop colors appear more natural. Choose dimmable fixtures and confirm that the LED driver and wall dimmer are listed as compatible. Use fixtures listed for the actual installation location. Follow clearance and installation instructions, especially around insulation and enclosed housings.
Living room Ceiling fixture or recessed lights combined with floor, table, or wall lamps About 10–20 lumens per square foot for ambient lighting, with additional task light for reading. 2700–3000 K CRI 90 or higher is a useful target for accurate color rendering. Dimming can help shift between general use and relaxed evening lighting; check LED and dimmer compatibility. Use a fixture with an appropriate listing for its location and mount it according to its instructions.
Bedroom Ceiling fixture or recessed lighting, with bedside reading lamps About 10–20 lumens per square foot for ambient lighting; provide separate light for reading. 2700–3000 K CRI 90 or higher is recommended when color accuracy matters, such as for clothing or décor. Use compatible dimmable lamps or fixtures for adjustable brightness; check whether the dimmer requires a minimum load. Verify the fixture’s listing and mounting requirements, including any specified support for ceiling-mounted fixtures.
Bathroom vanity Vertical lights beside the mirror or a suitable fixture above it Approximately 1,500–4,000 lumens total at the vanity, depending on mirror size and other room lighting. 3000–4000 K CRI 90 or higher is especially helpful for grooming and makeup application. Use a dimmer only if the fixture or lamp is marked dimmable and compatible with the control. Check the fixture’s location rating and applicable local electrical requirements for its distance from tubs, showers, and sinks.
Shower or tub area Recessed or surface-mounted fixture specifically designed for the installation location Choose output to supplement bathroom lighting; avoid relying on a single fixture for the entire room. 3000–4000 K CRI 80 or higher is generally suitable; higher CRI may be preferred for better color distinction. If dimming is desired, confirm the fixture, driver, and dimmer are compatible and approved for the installation. Use a fixture marked for the applicable damp or wet location. Where it can be exposed to shower spray, verify that its label permits wet-location use.
Dining area Pendant or chandelier over the table, with optional ambient lighting About 10–20 lumens per square foot for ambient lighting; select the pendant output for the table and room size. 2700–3000 K CRI 90 or higher can make food and table settings look more natural. A compatible dimmer allows adjustment for meals and general activities; verify the fixture’s dimming method before installation. Confirm the ceiling box and mounting hardware are rated to support the fixture’s weight; follow the manufacturer’s mounting instructions.
Hallway or entry Flush-mount or semi-flush ceiling fixture; wall sconces can supplement longer hallways About 5–10 lumens per square foot for general circulation lighting. 2700–3000 K CRI 80 or higher is typically adequate for general circulation. Check dimmer compatibility; occupancy or vacancy controls should also be compatible with the installed fixture. For stairways and narrow passages, position fixtures to limit glare and shadows, and install them in accordance with local electrical requirements.

Planning note: Lumens per square foot are approximate starting points, not code requirements. Actual needs vary with room size, ceiling height, surface colors, daylight, and fixture efficiency. CRI indicates color-rendering quality; kelvin (K) describes light color. Always check product labels, installation instructions, and local electrical codes before installation.

Go to Top